Downgrade WordPress 5.5 to 5.4.2 Manually
How to downgrade or rollback manually step by step tutorial WordPress v5.5 To v5.4.2 or Previous Version.
Running the latest version of WordPress core, plugins, and themes is one of the essential steps in maintaining your website. With the update to WordPress v5.5, this may lead to unexpected behaviors in some themes/plugins. The downgrade is a quick solution, for the time being, to avoid incompatible with this latest version of WordPress v5.5. But won’t get to the bottom of your issue. Usually rolling back versions should only be done temporarily, until making compatible all the theme/plugins, and you can go ahead and update to the latest version again.
WordPress 5.5 “Eckstine” It’s a major update. ?
WordPress v5.5 “Eckstine” was released to the public on August 11, 2020. This release has tons of changes that you’ll notice.
– Speed
– Improvements to the block editor
– Inline image editing & UI improvements
– Auto Update Your WP Theme and Plugins
– Core XML sitemaps
– Native lazy-loading of images
and many more features and bugfixes!
WordPress v5.5 compatibility issue.?
You are facing multiple issues after updating WordPress v5.5 because some plugins/themes are not compatible with this released latest version. Some plugins like Jetpack, Yoast SEO, WPBakery Page builder, some of the images(sliders), and widgets are missing on the website; the permalink button doesn’t work, a fatal error in emails, conflicts of javascript files, etc. may not work correctly.
If your site broke, don’t panic!?
Before you go any further, make sure you’ve updated your plugins and themes to the latest versions, clear your browser’s cache and cookies and re-log in to your WordPress dashboard.
Still, having problems??
It is better to downgrade WordPress safely to 5.4.2 until fixing this for the official WP 5.5 next patched release, as well as theme and plugins developer, update their compatibility.
There are two types of downgrade wordPress.
Method #1: Use Plugins like (WP Downgrade – Specific Core Version)
Method #2: Downgrade Manually (Replacing core WP files via FTP/file manager)
Here we mentioned Method #2 step by step downgrade manually.
Step #1: Backup all your WordPress files
Before using this method, it’s extremely important to a full backup of your website and database.
Step #2: Deactivate all your plugins
You should deactivate all your plugins from the Plugins page on your dashboard.
Step #3: Logout WordPress
After deactivating logout the WordPress.
Step #4: Use An FTP Client And Locate Your Site’s WordPress Files
You’ll need to access the document root folder where the wp-admin and wp-includes folders present of a WordPress site through an FTP client or File Manager in your hosting account’s control panel (cPanel, Plesk, DirectAdmin etc.). If you don’t have to access your control panel, then you may consult your hosting provider’s to downgrade it. Here I have shown you from FTP Client Filezilla.
You can download FTP Client here FileZilla, FireFTP, Cuteftp or SmartFTP.
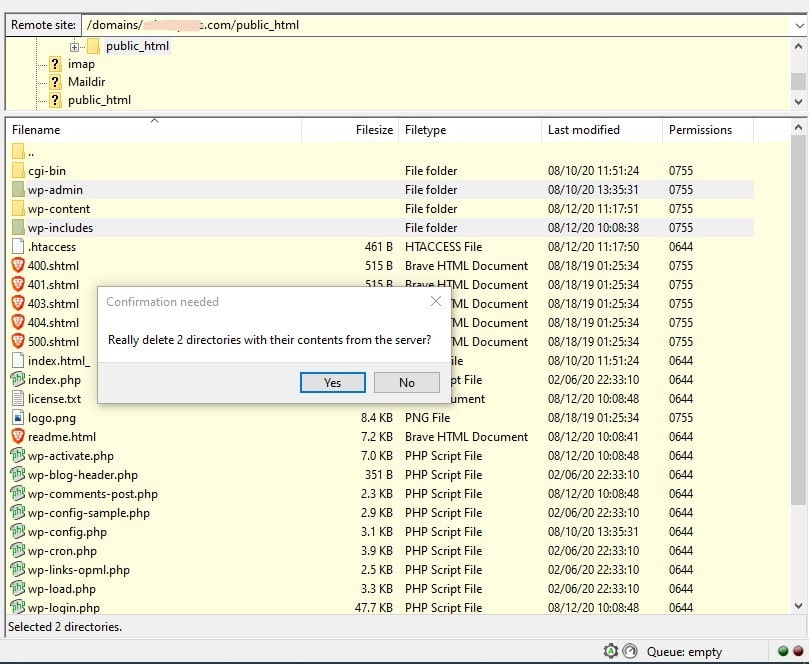
Step #5: Delete The WP-Admin and WP-Includes Folders
The two folders wp-admin & wp-includes are the folders that contain all of the PHP and configuration files that run WordPress. These are the WordPress core files. Delete only these two folders.
The other folder wp-content contains the theme, plugins, and media files that you have either installed or uploaded. Make sure you do not delete the wp-content folder as this could affect your site content.
You can leave all of the other files alone because you will overwrite them in the next step.
Step #6: Transfer The Files From The Previous WP Version to Your Site With FTP
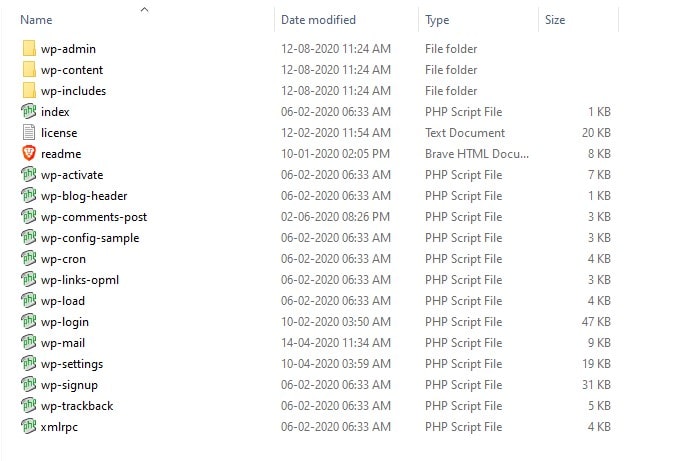
After download, extract wordpress4.5.2.zip file in the folder. Select all file and folder and upload in the root folder except wp-content folder.
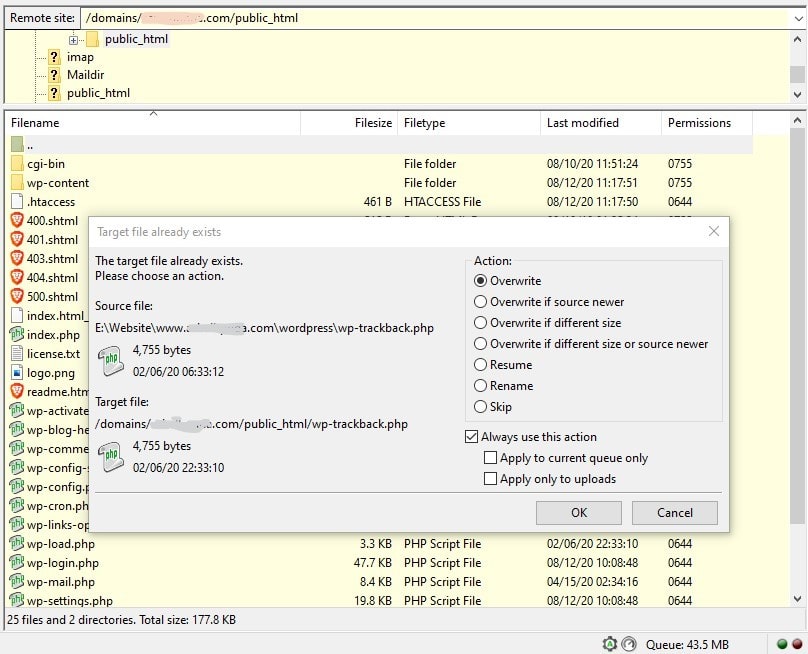
Select all files and folders except for the wp-content directory, which is download and extract. When asked if you want to overwrite all the existing files, select Overwrite (All files) > Ok
Step #7: Update Your WordPress Database
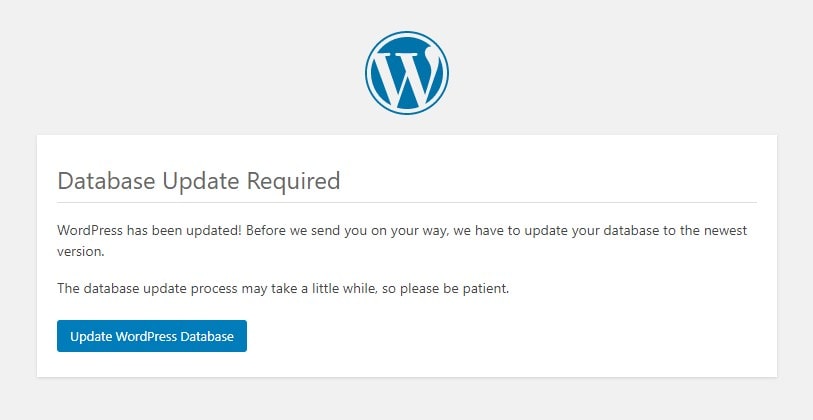
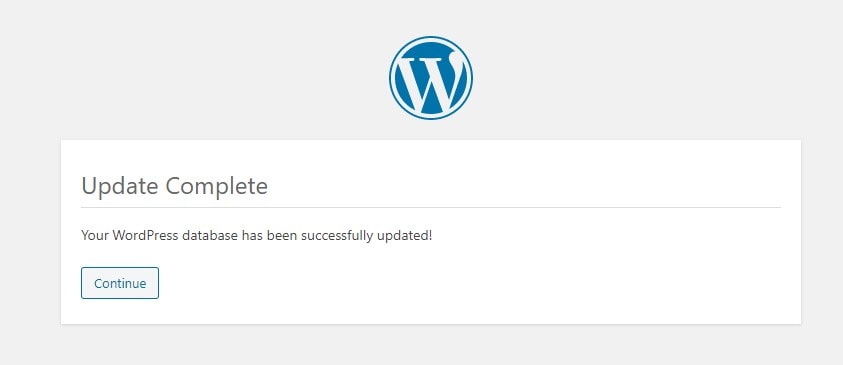
Login your wordpress it will ask Database Update Required – click on the Update WordPress Database.
A confirmation message shows Update Complete.
Congratulation! Your WordPress downgrade is successful. You should now have access and be running the older version of WordPress.
At this point, After everything you have done, you can re-activate your plugins and work on resolving the original conflict.
After that, you may have to rebuild your permalinks, In case you are getting 404 errors on your pages and posts after the WordPress core re-installation. You can see that option when you go to Settings → Permalinks.
For any problems encountered still appear after setting up WordPress. You can take support WordPress community by logging here.
In Conclusion,
Hopefully, all problems will be solved. If you come to this particular situation, the best move is to contact the plugin or theme developer for advice on your next step. This release has tons of changes that may break a lot of sites! So it is better to go back to the previous version until the 3rd party themes/plugins developers make fully compatible.
If you have any questions, feel free to leave a comment section below!


