Setup Webmail In IOS 10 or iPhone

How to Setup Webmail configuration on iPhone, and iPad running iOS 10.
This article will show you how to setup email on your iOS based device. If you have an email address with your own domain name, you need to be able to access those emails on iPhone or IOS 10. In this guide, we will show you how to set up or add your email account with IMAP to the mail app on your webmail iPhone with iOS 10.
There is the way that you can set up an email account in the webmail app on your iOS device automatically or manually. Here’s how:
1. Go to Settings icon – Select Mail

2. Choose Passwords & Accounts

3. Select Add Account

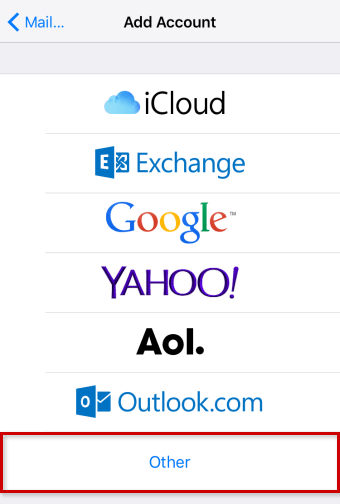
4. Choose Other

5. Choose Add Mail Account

6. Enter your account details:
Enter in your Name: The name others will see when receiving your mail (Ex. John Smith).
Enter your Email Address: The complete your email address (Ex. account@example.com).
Enter your Password: The password you entered when setting up the webmail address.
Enter a Description: Enter a description for your account here. This information is only used to better differentiate your account from one another.

Tap Next
Server Setup:
1. Receive your mail using the IMAP (recommended) or POP protocol by entering the respective hostname for Incoming Mail Server and Outgoing Mail Server.
2. Enter the remaining data and tap Next.

Incoming Mail Server, add the following:
Host Name: imap.Yourdomainname.com
User Name: The full email address of your webmail account (Ex. account@example.com)
Password: (Access Account Password)
Outgoing Mail Server, add the following:
Host Name: smtp.Yourdomainname.com
User Name: The full email address of your webmail account (Ex. account@example.com)
Password: (Access Account Password)
Synchronization Options
Select which data (mail, notes) you want to synchronize and confirm with Save

Select Save.
Well done! You have now configured your Webmail on iPhone.
Recommended Posts

Configure Webmail In Android Gmail App
24/12/2019


